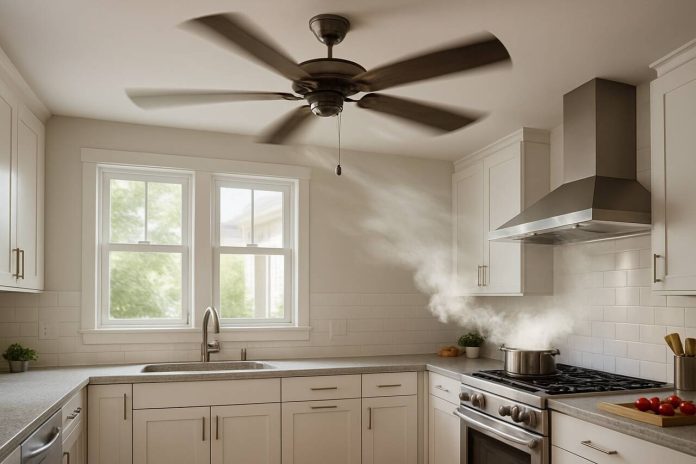
Proper ventilation is crucial for any kitchen, where cooking generates heat, moisture, and airborne particles that can affect both comfort and air quality. While range hoods are the primary solution for removing cooking odors and grease, ceiling fans can provide valuable supplemental ventilation to improve overall air circulation and create a more comfortable cooking environment. Installing a ceiling fan in your kitchen is a manageable DIY project that can significantly enhance your culinary space.
Understanding Kitchen Ventilation Needs
Kitchens face unique ventilation challenges compared to other rooms in the home. Cooking activities produce steam, smoke, grease particles, and elevated temperatures that can create uncomfortable conditions and potentially damage surfaces over time. A well-placed ceiling fan helps circulate air throughout the space, preventing hot air from stagnating near the ceiling and creating more even temperature distribution; you can review discount ceiling fans here.
Ceiling fans work by creating air movement that enhances the effectiveness of your existing ventilation system. They can help pull cooler air from adjacent rooms while pushing warm, humid air toward exhaust points like range hoods or open windows. This circulation is particularly beneficial in larger kitchens or open-plan designs where natural air movement may be limited.
Choosing the Right Fan for Your Kitchen
Selecting an appropriate ceiling fan for the kitchen use requires careful consideration of several factors. Size is paramount – a fan that’s too small won’t effectively circulate air in the space, while an oversized fan may overwhelm the room aesthetically and functionally. For most standard kitchens, fans ranging from 42 to 52 inches in diameter work well, though smaller spaces may benefit from 36-inch models.
Kitchen-specific features are essential when making your selection. Look for fans rated for damp or wet locations, as kitchens experience higher humidity levels than typical living spaces. Models with sealed motor housings and corrosion-resistant finishes will withstand the challenging kitchen environment better than standard residential fans.
Consider fans with variable speed controls and reversible motors. Multiple speed settings allow you to adjust air movement based on cooking activities, while reversible operation enables you to push warm air down in winter or pull it up in summer for optimal comfort year-round.
Planning Your Installation
Before beginning installation, carefully evaluate your kitchen’s layout and electrical requirements. The ideal location for a kitchen ceiling fan is typically in the center of the room or over a kitchen island, away from the immediate cooking area where grease and heat are most concentrated. Avoid positioning fans directly above stovetops or ranges, as this can interfere with proper range hood operation and expose the fan to excessive grease and heat.
Check your ceiling structure to ensure it can support the fan’s weight. Most ceiling fans weigh between 15 and 50 pounds, requiring adequate structural support. If you’re replacing an existing light fixture, verify that the electrical box is rated for fan support – standard light fixture boxes typically aren’t sufficient for fan installation.
Electrical considerations are crucial for safe installation. Kitchen ceiling fans require dedicated electrical circuits in many cases, particularly if they include integrated lighting. Verify that your home’s electrical panel can accommodate the additional load, and ensure all work complies with local electrical codes.
Essential Tools and Materials
Gathering the right tools before starting will streamline your installation process. You’ll need basic electrical tools including wire strippers, electrical tape, and a non-contact voltage tester for safety. Mechanical tools should include a drill with various bit sizes, screwdrivers, a stud finder, and a sturdy ladder or scaffolding for safe ceiling access.
Materials typically include the ceiling fan assembly, appropriate mounting hardware (often included with the fan), wire nuts for electrical connections, and potentially a new electrical box if your existing fixture box isn’t fan-rated. Some installations may require additional electrical wire if you’re adding new circuits or extending existing ones.
Step-by-Step Installation Process
Begin by turning off power to the installation area at your electrical panel and verifying the power is off using a voltage tester. Remove any existing fixtures carefully, taking note of wire connections for reference.
Install the mounting bracket according to manufacturer specifications, ensuring it’s securely attached to ceiling joists or appropriate structural elements. If your ceiling lacks adequate structural support at the desired location, you may need to install additional blocking between joists.
Assemble the fan motor and blade assemblies according to manufacturer instructions before lifting them to ceiling height. This ground-level assembly is safer and more efficient than working overhead.
Make electrical connections carefully, typically connecting black to black (hot), white to white (neutral), and green or bare copper to ground. Use appropriate wire nuts and ensure all connections are secure. Many modern fans include detailed wiring diagrams for installations with separate light and fan controls.
Mount the completed fan assembly to the ceiling bracket, ensuring all connections are secure and the fan is properly balanced. Test the installation thoroughly before completing final assembly steps.
Safety Considerations and Final Thoughts
Kitchen ceiling fan installation involves both electrical and structural work that requires careful attention to safety. Always work with power turned off at the panel, use appropriate personal protective equipment, and consider consulting a licensed electrician if you’re uncomfortable with any electrical aspects of the project.
Proper installation of a kitchen ceiling fan can significantly improve your cooking environment by enhancing air circulation, reducing humidity, and creating more comfortable temperatures. With careful planning and attention to detail, this DIY project can provide years of improved kitchen ventilation and comfort.


